How to Restore a Damaged Moroccan Hammam without a full refurbishment
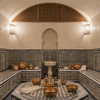
A damaged Moroccan hammam does not always need to be demolished and rebuilt from scratch. This is the single most important thing to understand before calling a contractor for a refurbishment quote. Cracked zellige tiles, failing grout, discoloured tadelakt walls, blocked steam nozzles and peeling sealant can all look catastrophic when you are standing inside the space — but in most cases they are fully restorable without demolition, without months of disruption, and without the six-figure price tag that full refurbishment commands.
Moroccan hammams in UAE properties are among the most valuable — and most demanding — spaces in any building. The UAE’s combination of extremely hard water, intense heat and high steam humidity accelerates damage faster than in almost any other climate. The result is that hammams which were installed correctly and looked stunning at handover can begin to show real signs of distress within three to five years without a proper maintenance routine.
This guide gives you a clear, practical framework for assessing what is actually wrong, identifying what can be restored rather than replaced, and carrying out — or briefing — a targeted restoration that brings your hammam back to full performance and appearance without the cost and disruption of full refurbishment.
What You Can Restore Without Full Refurbishment
- Individual cracked or chipped zellige tiles — provided the substrate beneath is dry and sound
- Hollow tiles (no surface damage) — re-bonding with the correct adhesive fully restores structural integrity
- Failed, discoloured or mould-contaminated grout lines across the whole space
- Surface limescale and mineral staining on zellige, glass and tadelakt
- Minor tadelakt wall cracks and surface staining
- Steam nozzle blockages and partial generator scaling
Failing door seals, threshold sealant and ventilation grilles
Assess the Damage First — Before Spending a Dirham
Every effective hammam restoration begins with an honest, thorough assessment — not with purchasing materials or booking a contractor. Starting repair work before you understand the full picture is the most common and most expensive mistake in partial hammam restoration. Surface repairs applied over underlying moisture problems, hollow tiles, or failing adhesive will fail again within months.
The Tap Test — Start Here
Pick up a coin or the handle of a screwdriver and tap every tile in the hammam, section by section. A solid, dense sound means the tile is well-bonded to the wall or floor. A hollow or drum-like sound means the adhesive bond has failed — the tile is floating free of the substrate and is at high risk of cracking under load or thermal stress. Mark every hollow tile with a small piece of masking tape. This map of hollow tiles is the most important document you will create during the entire restoration process.
Check for Active Moisture
After the tap test, look carefully along the base of all walls and around the floor drain for any signs of efflorescence — the white powdery mineral deposits that appear when water is migrating through a concrete or render substrate. Check the ceiling for any watermark staining. Press firmly on the wall tiles in any area that felt damp during your tap test. Active moisture infiltration — water coming from behind the tiles rather than just surface condensation — must be addressed before any surface repair work begins. Applying tile adhesive, grout or sealant over a wet substrate guarantees failure within weeks.
⚠️ Sequence Matters More Than Products • Always regrout before resealing — sealant applied over failing grout seals in the moisture that destroys it • Always address hollow tiles before grouting — new grout over a floating tile accelerates the crack when that tile eventually moves • Always fix moisture infiltration before any surface work — it renders every surface repair temporary • Always clean and dry surfaces fully before any adhesive, grout or sealant application — bond strength depends on it |
The 5-Step Restoration Process for a Moroccan Hammam
Once your assessment is complete, follow this sequence exactly. Each step creates the correct foundation for the next one.
Step 1 — Deep Clean the Entire Space
Before any repair work can be accurately assessed or started, every surface in the hammam must be properly deep cleaned. Limescale, soap residue, mineral deposits and surface mould mask the true condition of the grout, tile glaze and tadelakt — and they prevent any repair material from bonding correctly if left in place.
Use a pH-neutral specialist hammam or tile cleaner on all zellige and tadelakt surfaces. Never use vinegar, citric acid or any acid-based product on these materials — acid etches the zellige glaze permanently and dissolves the lime in tadelakt, causing irreversible surface damage. For grout lines, an oxygen-bleach grout cleaner applied with a stiff brush exposes the true condition of the grout without attacking the tile or the surrounding plaster. Descale the steam nozzles with a white vinegar soak and a soft toothbrush, and treat all drains with an enzyme drain cleaner. Allow a minimum of 48 hours drying time before any assessment is finalised or repair materials are applied.
Step 2 — Replace and Re-Bond Failing Tiles
With a clean, dry surface, return to your hollow tile map. Every tile that produced a hollow sound during the tap test must be re-bonded — even if it looks perfectly intact on the surface. A hollow tile in a hammam environment will crack under the next thermal cycle, which in the UAE means within days during summer.
Carefully remove the grout from all joints surrounding each hollow tile using an oscillating grout removal tool. Use a flexible palette knife to gently prise the tile away from the wall — work progressively from the centre outwards and never force a tile that is resisting. Scrape all old adhesive from both the wall face and the tile back completely. Apply a flexible, polymer-modified tile adhesive rated for wet rooms and high-temperature environments — this is a non-negotiable specification in UAE hammam conditions where standard acrylic adhesives soften above 40°C. Apply adhesive to both surfaces (double-buttering technique), set the tile back into position and support it with plastic tile wedges until the adhesive achieves initial set. Allow a minimum of 24 hours before grouting.
For cracked tiles that need replacement, source matching zellige from a specialist UAE supplier before beginning removal. Zellige batch colours vary — ordering after removal creates a colour mismatch that is difficult to correct. If importing from Morocco, allow three to six weeks for delivery and order at least 20% more than the number of tiles you need to replace.
Step 3 — Regrout All Failing Lines
Once all tiles are sound and fully bonded, regrout the entire hammam — not just the sections that look obviously failed. Grout ages uniformly across a space. Selective regrouting creates visible colour and texture inconsistencies that are worse aesthetically than the original damage. It also leaves older grout sections that will require the same treatment within one or two years.
Rake all existing grout back to a minimum depth of 4mm using a grout removal tool. Apply an anti-mould, flexible grout rated for steam room applications in a colour that matches the original as closely as possible. Pack all joints fully — voids create water traps that accelerate adhesive failure. Seal all internal corner joints and movement gaps with a flexible silicone sealant colour-matched to the new grout. Allow 72 hours full cure before any moisture exposure.
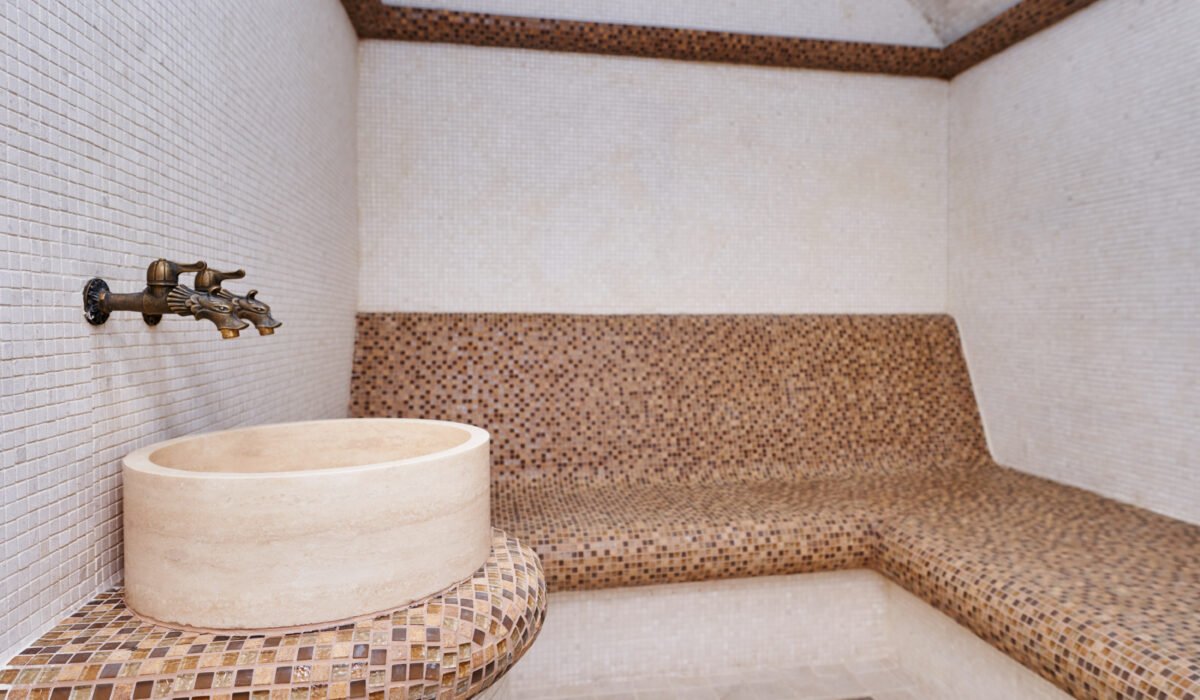
Step 4 — Repair Tadelakt Walls and Surfaces
Tadelakt — the traditional polished lime plaster finish characteristic of authentic Moroccan hammams — requires sympathetic repair rather than full replacement in most partial restoration scenarios. Minor surface cracks respond well to targeted tadelakt patch repair. Major areas of delamination where the plaster has physically separated from the wall substrate must be fully removed and re-applied — there is no surface treatment that bridges structural detachment.
For hairline cracks and surface staining, dampen the affected area with clean water, press matching tadelakt paste into the crack firmly with a palette knife, and compact and polish with a smooth steel trowel. Tadelakt derives its water resistance from compression during the polishing stage — rushed or under-polished repairs will not waterproof correctly. For colour-matching, always test a small patch on a hidden section of wall and allow it to fully dry before applying to a visible area, as tadelakt darkens significantly when wet and lightens as it cures.
Step 5 — Service the Heating System and Seal the Space
The final stage of hammam restoration addresses the two most overlooked elements — the heating system and the protective sealant layer — without which even perfectly restored surfaces will deteriorate again within months.
For the heating system, a professional descaling of the steam generator is essential if the hammam has not been descaled within the previous six months. In UAE hard water conditions, scale accumulates on heating elements at a rate that reduces steam output by up to 40% within 12–18 months of installation. A full descale, solenoid valve inspection and pressure relief valve test should be carried out as part of every hammam restoration — not as an afterthought. Clean steam nozzle faces and run a full test cycle to verify output pressure and distribution before considering the restoration complete.
For sealing, apply a penetrating impregnating sealant to all zellige tile surfaces and grout lines once the grout has fully cured. This creates a hydrophobic barrier that dramatically slows mineral deposit adhesion — the primary driver of the limescale and staining that triggered the need for restoration in the first place. Reapply annually in UAE hammam conditions to maintain the barrier. Replace all door threshold sealant and door seal gaskets as a standard conclusion to every restoration — these are the most common water ingress points in any hammam and the cheapest components to renew.
What Does Partial Hammam Restoration Cost in the UAE?
Partial restoration — even when it involves tile replacement, full regrouting and a heating service — costs a fraction of full refurbishment. To give a realistic sense of what to expect:
WORK SCOPE | TYPICAL COST (AED) |
Full deep clean and descale | AED 600 – 1,200 |
Regrout entire hammam (up to 10 sqm) | AED 1,500 – 3,500 |
Individual zellige tile replacement (each) | AED 150 – 400 |
Tadelakt patch repair (minor cracks) | AED 800 – 2,000 |
Full tadelakt wall re-application (per sqm) | AED 400 – 900 |
Steam generator descale and service | AED 500 – 1,200 |
Full partial restoration (no demolition) | AED 4,000 – 18,000 |
Full refurbishment (demolition + rebuild) | AED 45,000 – 150,000+ |
These figures are indicative — actual costs depend on the size of the hammam, the extent of damage, and whether specialist materials such as imported Moroccan zellige are required. The difference between partial restoration and full refurbishment is typically a factor of five to ten times in cost. In almost every case where damage is caught before structural failure, partial restoration is the financially correct decision.
How to Prevent the Same Damage Recurring After Restoration
Restoration without a prevention plan simply resets the clock on the same damage. The UAE’s hard water, extreme heat and heavy air conditioning cycling will re-create the same failure conditions in a restored hammam just as quickly as they damaged the original — unless the underlying maintenance routine is changed.
- Wipe down all tile and tadelakt surfaces with a dry microfibre cloth after every single session — mineral deposits begin bonding to surfaces within hours of the water evaporating
- Use only pH-neutral cleaners on all hammam surfaces — no vinegar, no acid descalers, no bleach
- Descale the steam generator quarterly in UAE conditions — not annually as most European maintenance schedules suggest
- Re-seal all tile and grout surfaces annually with an impregnating sealant — this single step reduces mineral adhesion by 60–70%
- Book an annual professional inspection — a qualified hammam specialist can identify the early signs of grout failure, hollow tiles and adhesive degradation before they progress to structural damage that requires replacement rather than restoration
A damaged Moroccan hammam is rarely a lost one. In the majority of UAE properties, even hammams that look significantly deteriorated can be brought back to full performance and authentic appearance through targeted partial restoration — at a fraction of full refurbishment cost and without the disruption of demolition. The key is assessing the damage correctly, working in the right sequence, using the right materials, and addressing the root causes — not just the surface symptoms.
Invest in a restoration when the signs first appear. The cost difference between catching damage at the grout-and-tile stage and waiting until the substrate and waterproofing are compromised is not marginal — it is the difference between a four-day restoration job and a four-month rebuild.
✅ Need a Professional Hammam Restoration Assessment in the UAE?
- We assess and restore Moroccan hammams across Dubai, Abu Dhabi and the UAE — partial restoration specialists
- All tile, grout, tadelakt, zellige and heating work carried out by experienced hammam restoration technicians
- Full written assessment report provided before any restoration work begins